
Creating templates for Learning or Behaviour Plans
Membuat Template untuk Learning Plan atau Behaviour Plan
Artikel ini menjelaskan cara membuat template yang dapat digunakan oleh staf saat mengisi Learning Plan dan Behaviour Plan untuk siswa.
Perencanaan pembelajaran yang baik membantu guru tetap terorganisir dan fokus pada tujuan pembelajaran, sehingga siswa dapat mencapai target mereka dengan lebih mudah. Selain itu, gangguan di dalam kelas dapat diminimalkan, beban kerja guru menjadi lebih ringan, dan lingkungan belajar menjadi lebih optimal. Learning Plan dan Behaviour Plan membantu sekolah mencapai tujuan tersebut.
Prestia memungkinkan Anda membuat Learning Plan atau Behaviour Plan untuk siswa dengan menggunakan field (kolom) yang dapat disesuaikan sesuai dengan informasi yang ingin dicatat. Setelah field tersebut dibuat, Anda dapat membuat template Microsoft Word yang dapat dicetak kapan saja. Template tersebut akan diformat secara otomatis dan menampilkan data yang telah diisi oleh pengguna.
Melihat Template yang Sudah Ada
1. Login ke Prestia sebagai Administrator.
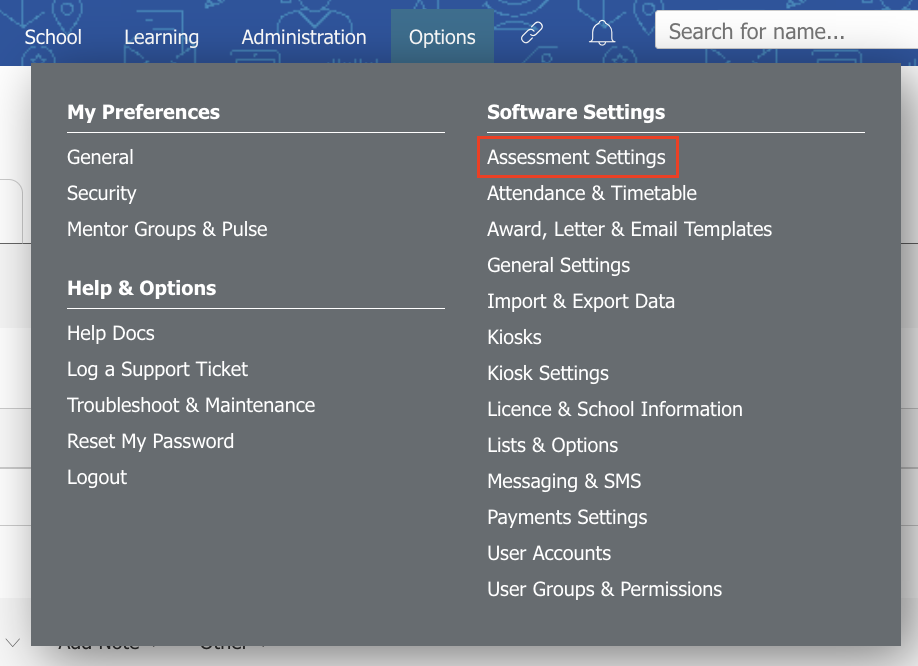
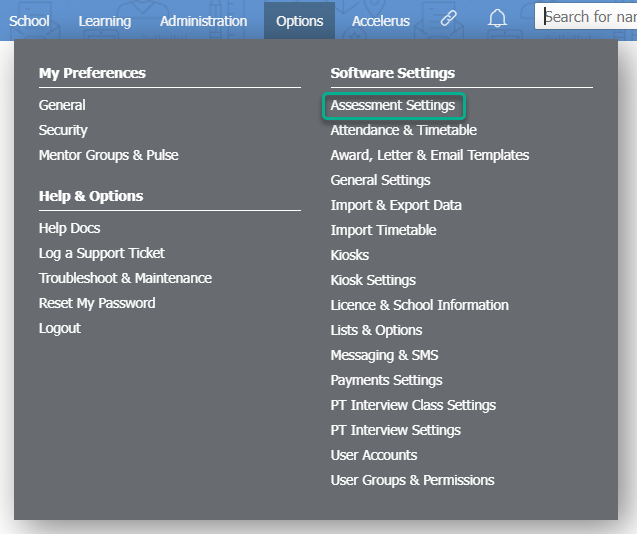
2. Buka Options > Software Settings > Assessment Settings.
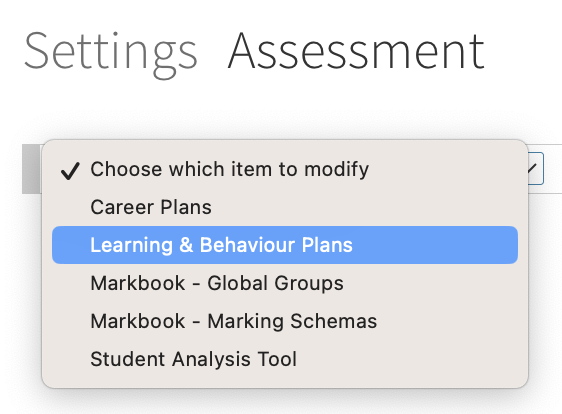
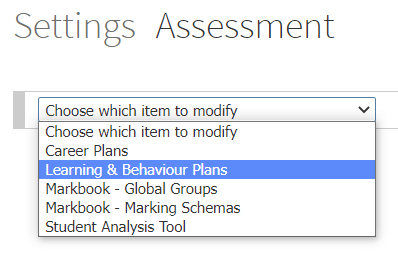
3. Pada daftar dropdown, pilih Learning & Behaviour Plans.
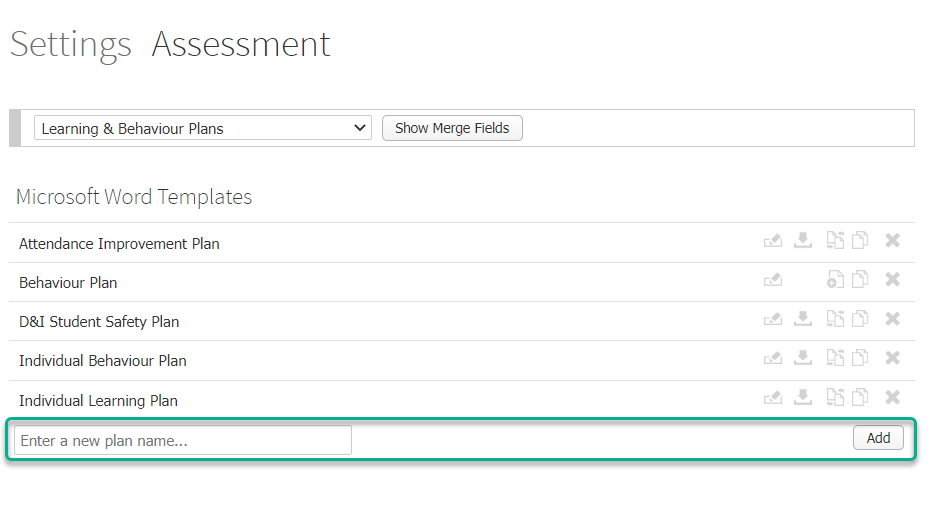
4. Daftar template yang telah dibuat akan ditampilkan.
Membuat Template Baru atau Mengubah Template yang Sudah Ada
Anda dapat membuat sebanyak mungkin template, masing-masing dengan pertanyaan, field teks, dropdown, maupun checkbox yang berbeda sesuai kebutuhan.
1. Ikuti langkah 1 dan 2 di atas untuk membuka daftar Learning & Behaviour Plans
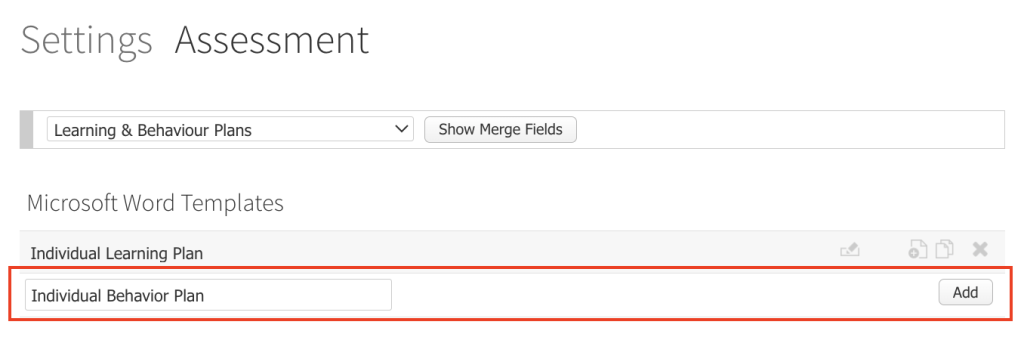
2. Untuk membuat template baru, masukkan nama template pada kotak Enter a new plan name…, kemudian klik Add. Template baru akan muncul pada daftar.
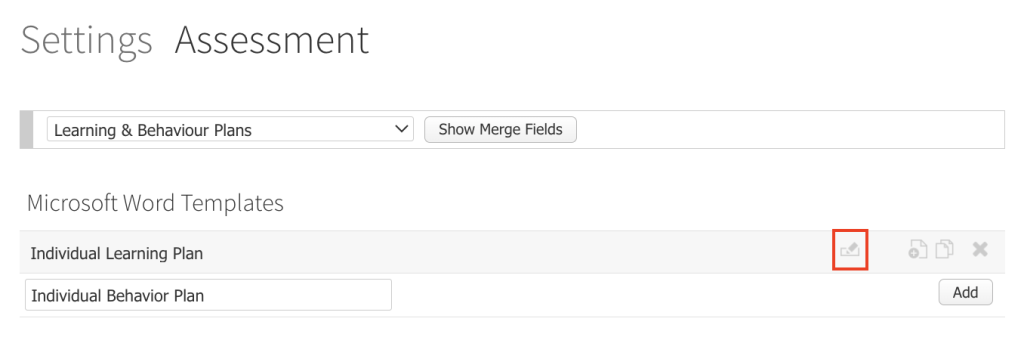
3. Untuk menambah atau mengubah field pada template, klik ikon Edit fields di samping nama template.
Catatan:
Jika Anda mengubah field pada template yang sudah pernah digunakan untuk membuat Learning Plan atau Behaviour Plan, perubahan tersebut dapat memengaruhi integritas data dan tampilan template Microsoft Word saat dicetak. Lakukan perubahan dengan hati-hati. Hubungi Prestia Support apabila memerlukan bantuan.
4. Pada jendela pop-up yang terbuka, masukkan nama field baru pada kotak Add new item….
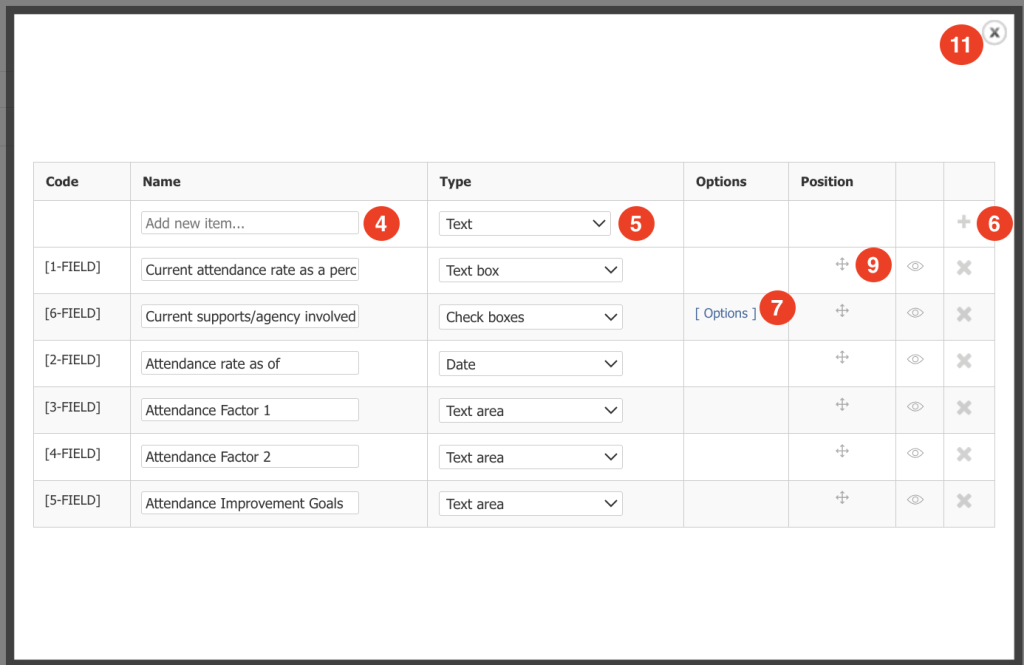
5. Pilih jenis field yang ingin ditambahkan pada dropdown di kolom Type. Jenis-jenis field yang tersedia:
- Text – Teks biasa yang ditampilkan pada halaman sebagai informasi bagi pengguna.
- Check boxes – Sekumpulan checkbox yang dapat dipilih lebih dari satu oleh pengguna. Opsi checkbox akan dibuat pada Langkah 7.
- Date – Field untuk memilih tanggal melalui kalender.
- Drop down (Multiple) – Daftar pilihan (dropdown) yang memungkinkan pengguna memilih lebih dari satu opsi. Opsi akan dibuat pada Langkah 7.
- Drop down (Single) – Daftar pilihan (dropdown) yang hanya memperbolehkan pengguna memilih satu opsi. Opsi akan dibuat pada Langkah 7.
- Sub-heading – Subjudul yang ditampilkan dengan teks tebal.
- Heading (with line) – Judul yang disertai garis horizontal di bawahnya.
- Radio buttons – Sekumpulan pilihan yang hanya memperbolehkan pengguna memilih satu opsi. Opsi akan dibuat pada Langkah 7.
- Text area – Field untuk memasukkan teks dalam jumlah banyak yang dapat terdiri dari beberapa baris.
- Text box – Field untuk memasukkan teks satu baris.
6. Klik ikon + untuk menambahkan field.
7. Untuk menambahkan pilihan pada field yang memerlukannya (misalnya checkbox atau dropdown), klik tulisan [ Options ].
8.Pada jendela pop-up yang muncul, tambahkan setiap pilihan dengan mengetikkan nama opsi pada kolom Add a new item… di bagian Item Name, kemudian klik ikon +.
9. Jika diperlukan, ubah urutan field menggunakan tombol panah atas dan bawah.
10. Ulangi langkah 4–9 untuk menambahkan field lainnya.
11. Setelah selesai, tutup jendela pop-up dengan mengklik ikon X di pojok kanan atas.
Membuat, Mengedit, dan Mengganti Template Microsoft Word
Anda dapat membuat template Microsoft Word yang akan digunakan bersama Learning Plan atau Behaviour Plan. Template ini akan mengambil informasi yang telah diisi pada rencana siswa dan dapat dicetak dari profil siswa maupun secara massal.
Untuk informasi lebih lanjut mengenai pembuatan Learning Plan atau Behaviour Plan, lihat artikel terkait “Menambahkan Learning Plan, Behaviour Plan, atau Career Plan untuk satu atau beberapa siswa.”
Membuat Template Microsoft Word Baru
1. Buka dokumen baru di Microsoft Word.
2. Buat tampilan dokumen sesuai kebutuhan sekolah, termasuk font, format, dan gambar.
3. Tambahkan merge field yang ingin ditampilkan pada template. Untuk menambahkan merge field, cukup ketik atau salin-tempel kode merge field beserta tanda kurung siku ([]).
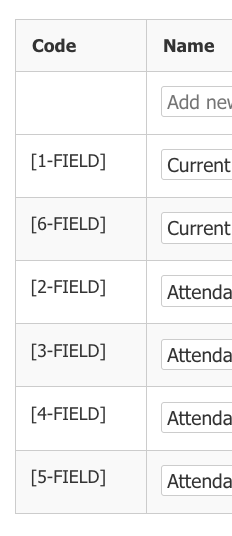
Merge field yang berkaitan dengan template dapat ditemukan pada kolom Code di jendela Edit fields pada template yang sedang diedit. Cara membuka jendela tersebut dijelaskan pada langkah 1–3 di bagian “Membuat Template Baru atau Mengubah Template yang Sudah Ada.”
Selain itu, Anda juga dapat melihat merge field umum yang berkaitan dengan data siswa, data keluarga, dan informasi lainnya dengan mengklik tombol Show Merge Fields.

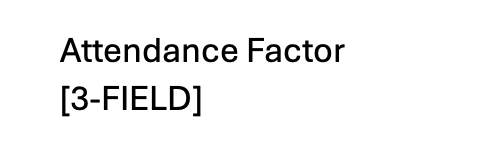
Sebagai contoh, jika menggunakan merge field dari tabel pada langkah 4 di bagian sebelumnya, template Microsoft Word dapat berisi merge field tersebut.
Saat Learning Plan diisi dan dicetak untuk seorang siswa, bagian template Word yang berisi merge field [3-FIELD] akan otomatis menampilkan isi yang dimasukkan oleh staf pada field Goal 1.
4. Simpan template sebagai dokumen Microsoft Word (.docx), kemudian tutup file tersebut.
Mengunggah Template Microsoft Word ke Template Learning Plan atau Behaviour Plan
1. Jika template belum memiliki file Microsoft Word, klik ikon Upload Word template di samping nama template.

2. Klik tombol Choose file, pilih file template, kemudian klik Add.
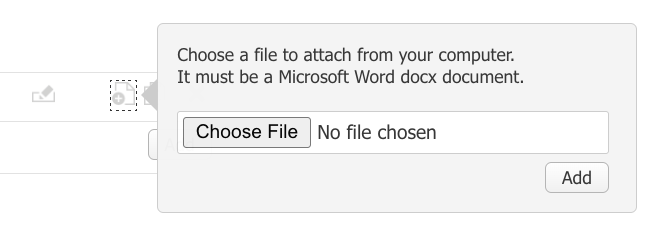
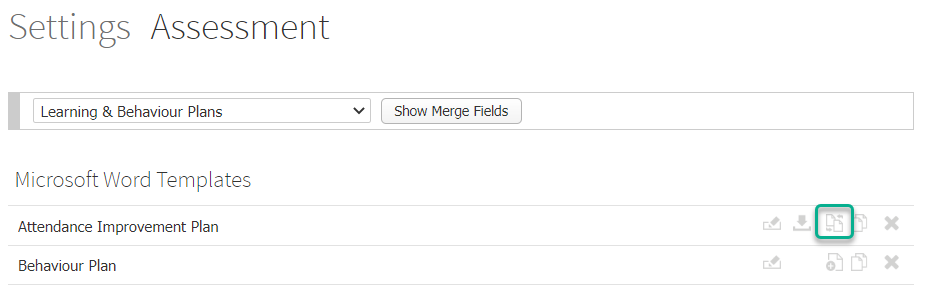
3. Jika template sudah memiliki file Microsoft Word, klik ikon Replace Word template di samping nama template.

Mengunduh dan Mengedit Template Microsoft Word
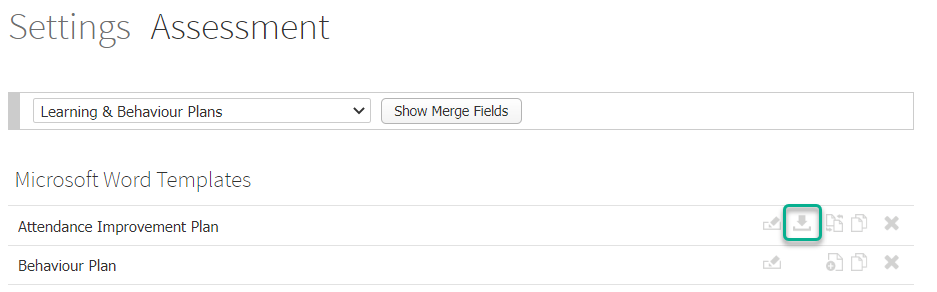
1. Klik ikon Download di samping nama template.

2. Buka file yang telah diunduh menggunakan Microsoft Word. Secara default, file akan tersimpan di folder Downloads pada komputer Anda. Jika tidak ditemukan, periksa pengaturan browser Anda.
3. Lakukan perubahan yang diperlukan, kemudian simpan kembali sebagai file .docx.
4. Ikuti langkah-langkah pada bagian Mengunggah Template Microsoft Word ke Template Learning Plan atau Behaviour Plan untuk mengunggah file yang telah diperbarui.
Proper classroom planning will keep teachers organised and on track and help the students to reach their objectives more easily, class room disruptions are minimised, the stress on the teacher is reduced, and the learning environment is optimised for students. Learning and Behaviour Plans will help you achieve that.
Prestia allows you to create learning or behaviour plans for your students with customised fields depending on the data you want to record. Once you have created these fields, you can create a Microsoft Word document which can be printed at any time. This template will be formatted accordingly and will include the data entered by the users.
Viewing existing templates
- Log in to Prestia as an Administrator.
- Go to Options > Software Settings > Assessment Settings .
- Using the dropdown list, choose the Learning & Behaviour Plans option.
- Your existing plans are displayed in the list.
Creating new or modifying existing templates
You can set up as many plan templates as you like – each with its own questions, text fields, dropdown lists and checkboxes.
- Follow steps 1 and 2 above to navigate to your current list of learning and behaviour plans.
- If you are creating a new plan, enter the name of the plan in the text box that says Enter a new plan name… and then click the Add button. Once the new plan is created it will appear in the list.
- To add or edit the fields of a plan, click the Edit fields icon next to the name of the plan.

Note : If you edit a field for templates that have already been used to create plans, this can affect data integrity and display of the Microsoft Word templates when printed. Proceed with caution, and contact Prestia Support for assistance if needed.
- In the popup window opened, enter the name of the new field you would like to add in the Add new item… text box.
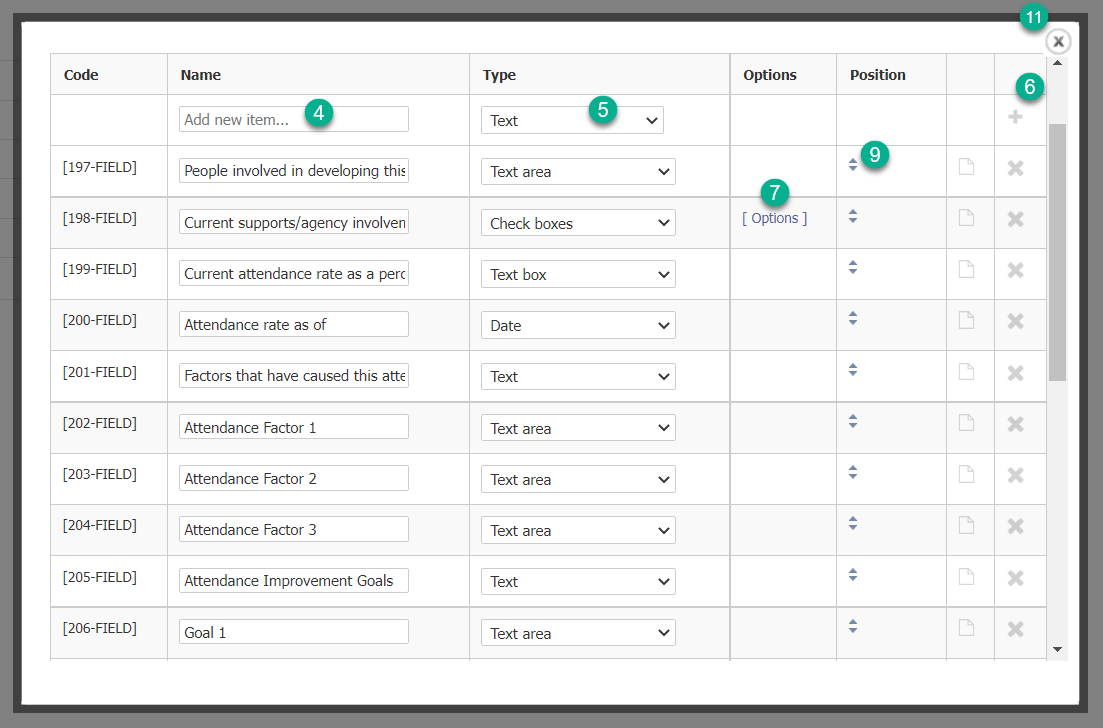
- Select the type of field you would like to add from the dropdown list in the Type column. The types of fields are:
- Text – General text to be displayed on the page for user information.
- Check boxes – A set of one or more checkboxes which the user can select. Users can select as many checkboxes as they want. You will create options in Step 7.
- Date – A field in which users can select a date from a calendar displayed on the page.
- Drop down (Multiple) – A dropdown list of pre-defined entries of which the user can select multiple options. You will create options in Step 7.
- Drop down (Single) – A dropdown list of pre-defined entries of which the user can select only one option. You will create options in Step 7.
- Sub-heading – A sub-heading to be displayed on the page in bold text.
- Heading (with line) – A heading with a horizontal line underneath the text.
- Radio buttons – A set of pre-defined options of which the user can only select one. You will create options in Step 7.
- Text area – A text entry field in which the user can type large amounts of text spanning across multiple lines.
- Text box – A text entry field in which the user can enter a single line of text.
- Click the + icon to add the field.
- To add options for a field type that requires them (e.g. checkboxes, dropdown lists), click the [ Options ] text.
- In the popup that appears, enter as many options as required by typing a name into the Add a new item… field in the Item Name column, then clicking the + icon.
- Adjust the position of the field using the up and down arrows if necessary.
- Repeat Steps 4 to 9 for additional fields as necessary.
- Close the popup window using the X icon in the top right when you have finished adding or editing all fields.
Creating, editing and replacing Microsoft Word templates
You can create Microsoft Word templates to attach to your Learning or Behaviour Plans. These use the information entered into a student’s plan, and can be printed from a student’s profile, or in bulk. See the related article ‘ Adding Learning Plans, Behaviour Plans or Career Plans for individual or multiple students ‘ for more information.
To create a new Microsoft Word template
- Open a new Microsoft Word document.
- Create your document with fonts, formatting and images to suit your school.
- Add any merge fields to the template that you would like to include from the plan. To include a merge field in a Word template, simply type or copy and paste the text, including the square brackets.
The merge fields specific to the plan can be found in the Code column of the Edit fields window of the plan you are editing. See Steps 1 to 3 in the section above, ‘Creating new or modifying existing templates’ for how to access this window.
You can also find generic merge fields relating to the student, family details and more by clicking on the Show Merge Fields button.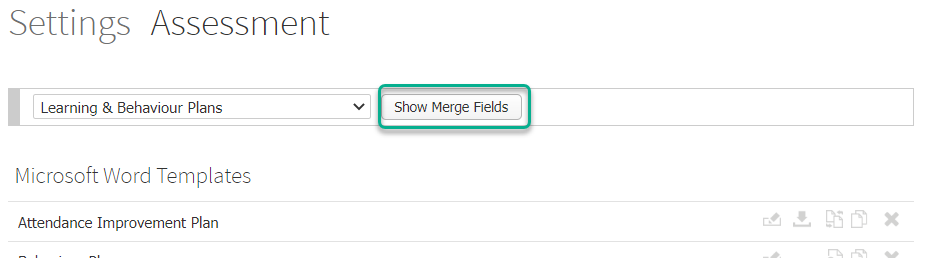
For example, if we used a merge field from the table shown in Step 4 of the above section, ‘Creating new or modifying existing templates’, a Microsoft Word Template could include the following: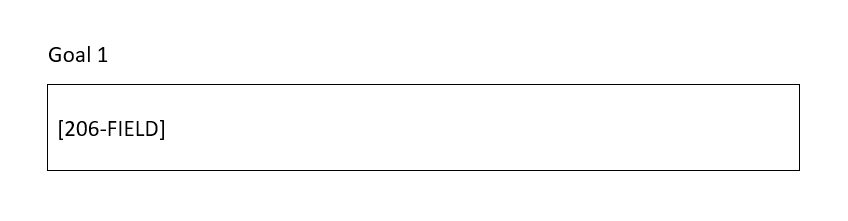 When this Learning Plan is filled in and printed for a student, this part of the Word template will display whatever text was entered in the ‘Goal 1’ text area when the staff member saved the plan in the place where the merge field ‘[206-FIELD]’ is located.
 - Save your completed template as a Microsoft Word document (.docx) and close the file.
To upload a Microsoft Word template to a Learning or Behaviour template
- If there is currently no Microsoft Word template attached to the plan, click the Upload Word template icon next to the name of the plan.
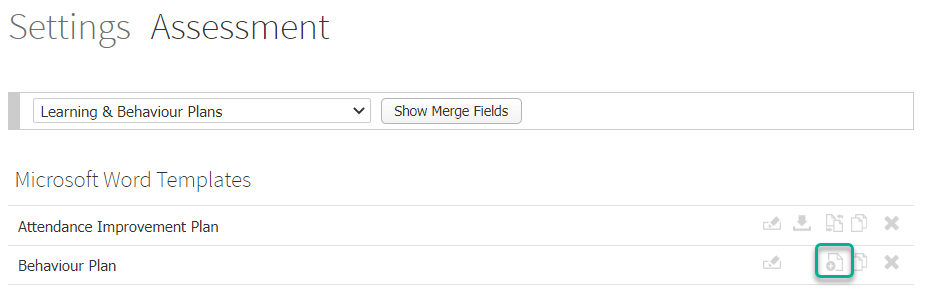
- Choose your file using the Choose file button, then click the Add button.
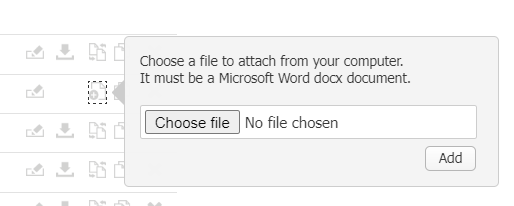
- If there is already a Microsoft Word template attached to the plan, click the Replace Word template icon next to the plan.
Note : If you replace a Microsoft Word template for plan templates that have already been used to create plans, this can affect display of the Microsoft Word templates when those plans are printed. Proceed with caution, and contact Prestia Support for assistance if needed.
To download and edit a Microsoft Word template
- Click on the Download icon next to the name of the plan.
- Open the downloaded file in Microsoft Word. The file should be in your computer’s Downloads folder – check your browser settings if you cannot find it.
- Make your changes, then save as a docx. file.
- Follow the steps above in the To upload a Microsoft Word template to a Learning or Behaviour Plan template section.