
How to manually add and modify student, contact and staff information
Important: This article is for schools without a SIS (such as CASES21).
It is not recommended that data is manually modified by schools with a SIS unless they need to change a name or code manually in advance of a scheduled data sync with their SIS system. Note that a SIS will usually overwrite any manual updates made in Prestia the next time the sync occurs.
Introduction
Student, parent/carer, emergency contact and staff information is generally imported from a School Information System (SIS), such as CASES21 via Eduhub, EdSAS via scripts, etc.
This method means that data is automatically updated from the SIS, as well as ensuring the data is the same as that in the SIS. However, some schools do not have a SIS.
Activating manual data entry
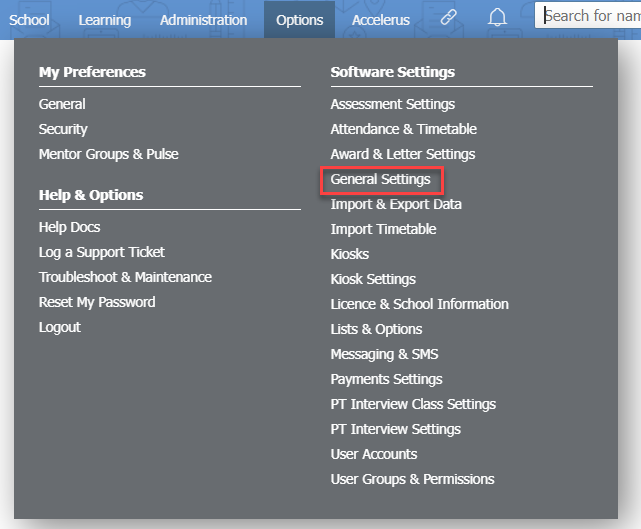
- Go to Options > Software Settings > General Settings.
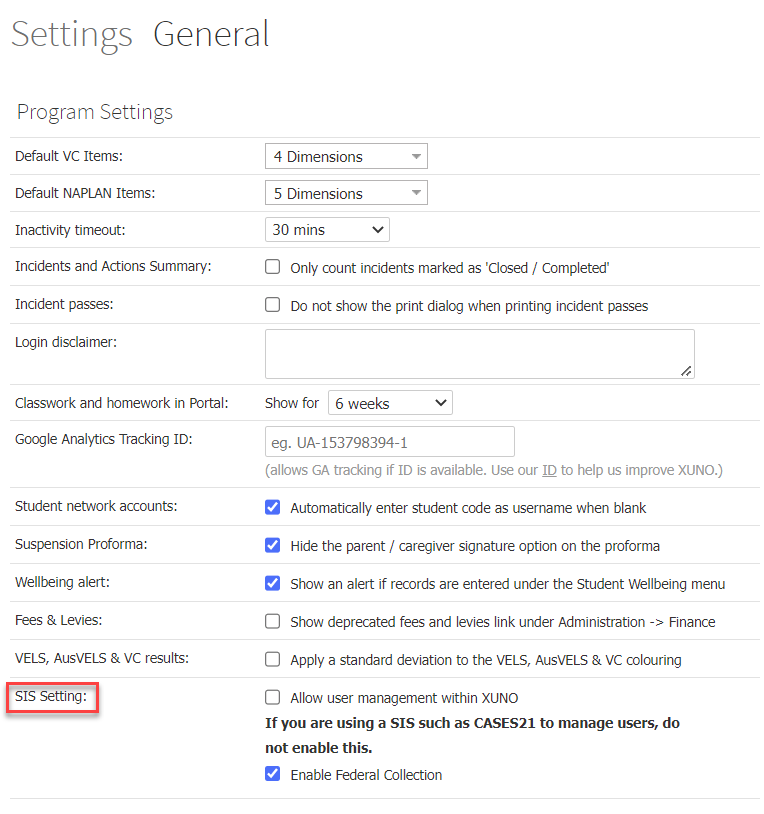
- Next to SIS Setting:, tick the Allow user management within Prestia checkbox.
- Click OK.
- Add optional prefixes for staff, student and/or contact codes in the relevant fields.
- Scroll to the bottom of the page and click the Save button.
Adding new staff records
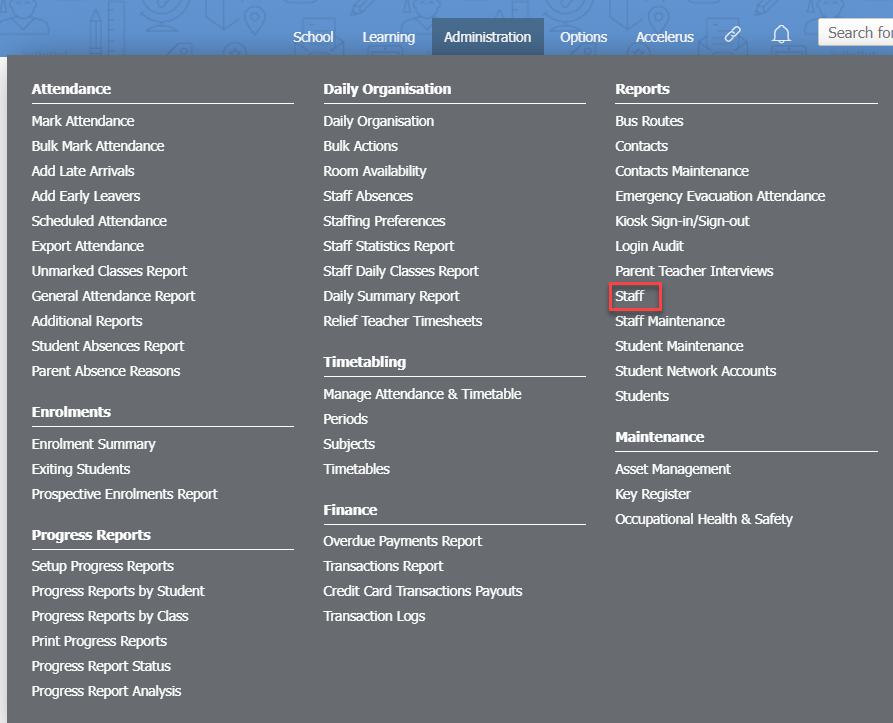
- Go to Administration > Reports > Staff.
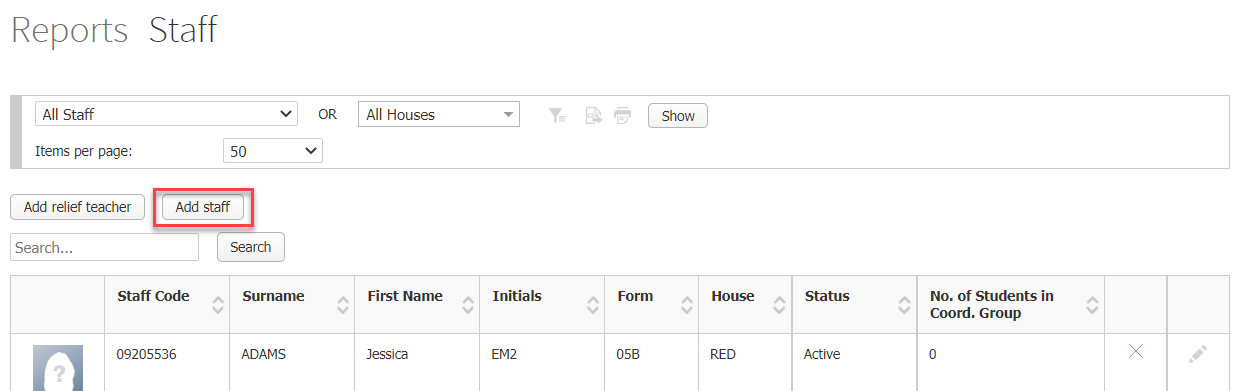
- Click the Add staff button.
- Enter staff details in each of the Personal Details, School Details, Availability and Federal Schools Census tabs as required. Note that fields marked with a red asterisk are mandatory.
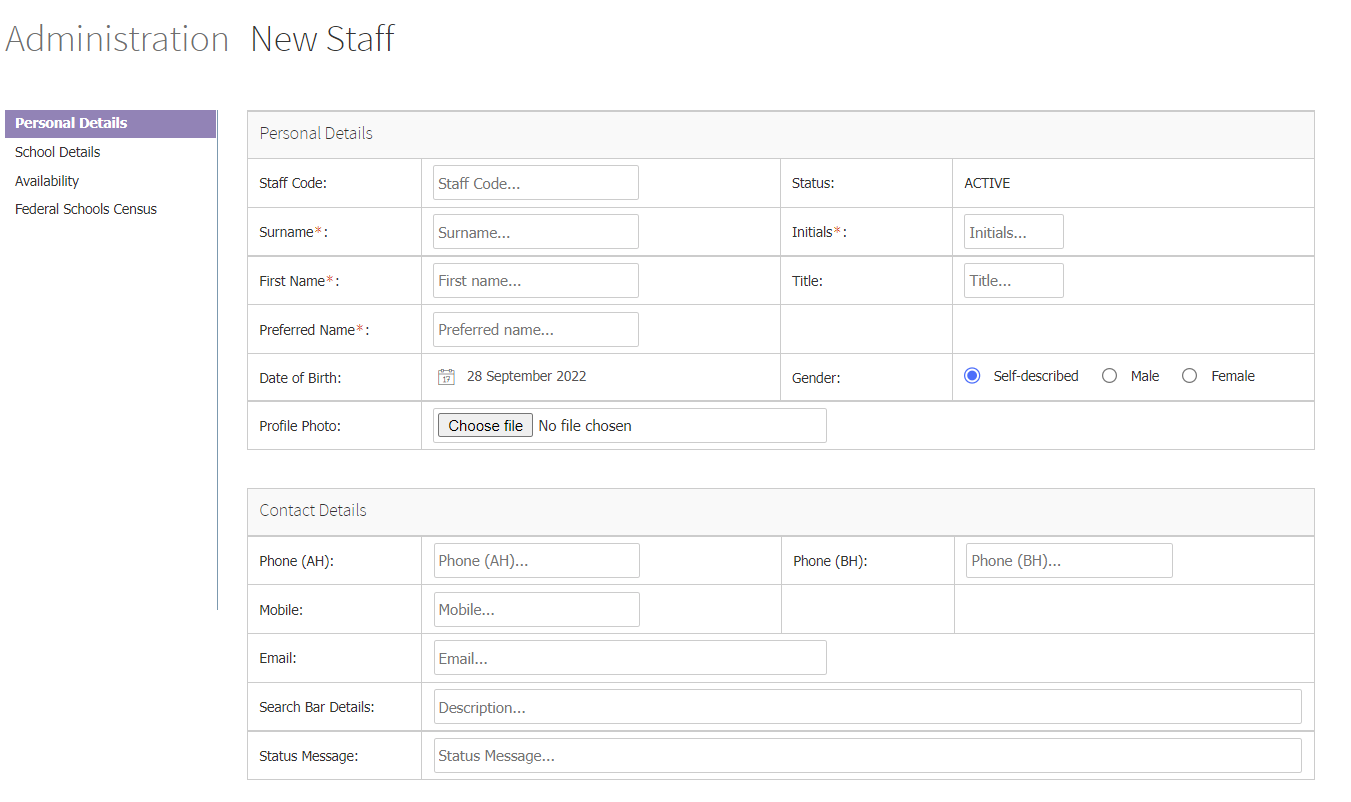
- Click the Save button at the bottom of the Personal Details tab.
Adding new contact (parent/carer) records
- Go to Administration > Reports > Contacts.
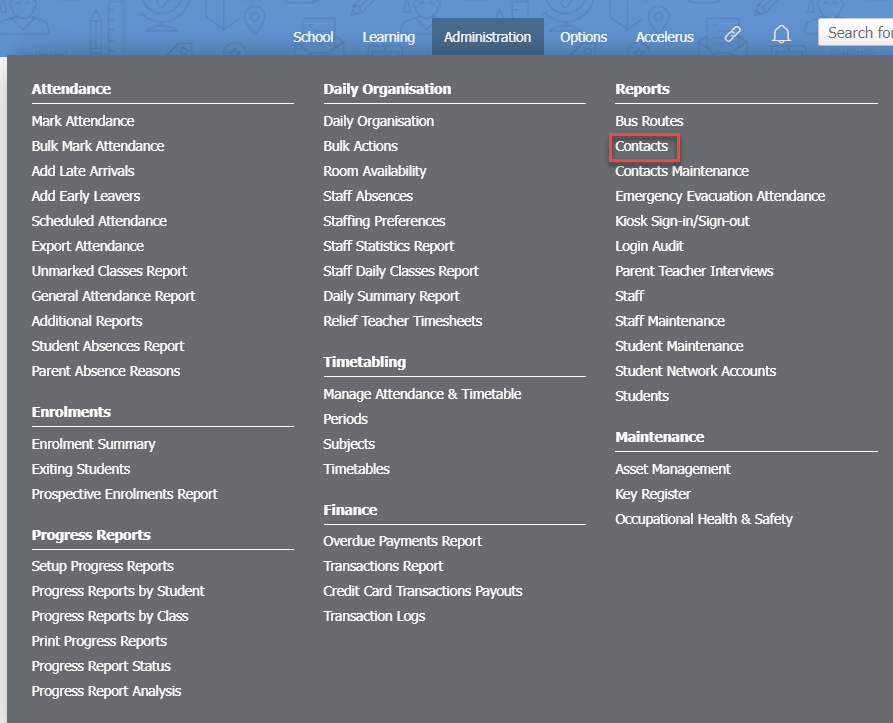
- Click the Add Family button.
- Enter data into the fields for the new family as required. Note that fields marked with a red asterisk are mandatory.
- Click the Save button.
Adding new student records
Note: If the student has no other siblings at the school, we recommend you create the new family contacts using the steps above before adding the new student, so that they can be linked to the new family easily.
- Go to Administration > Reports > Students.
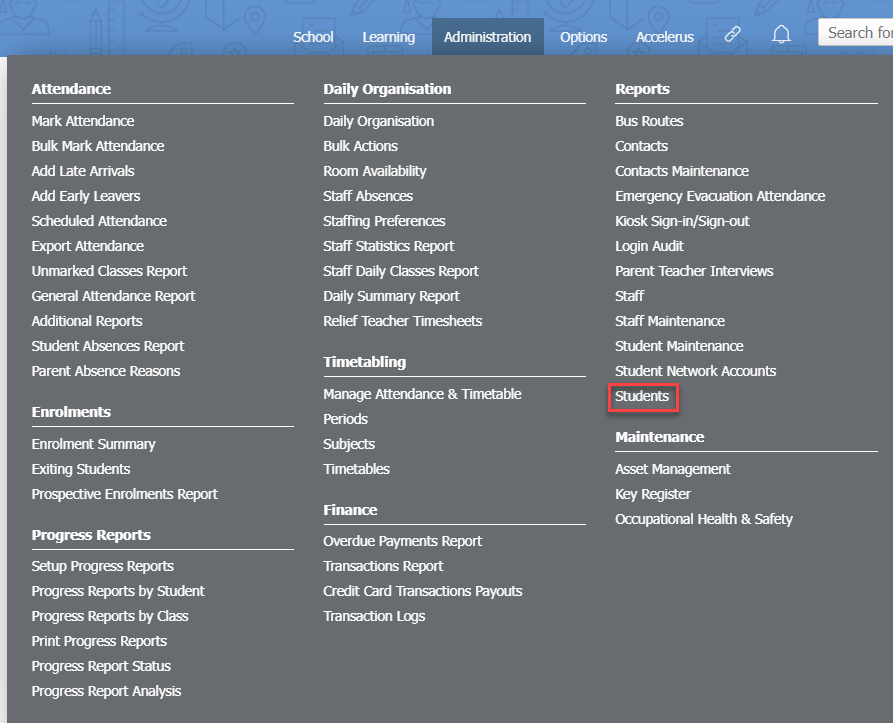
- Click the Add student button.
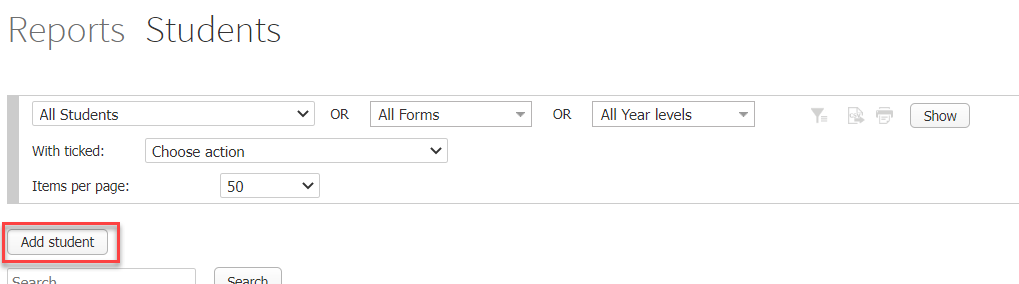
- Enter data into the fields for the new student in each of the Personal Details, School Details, Federal Data Collection and Background tabs as required. Note that fields marked with a red asterisk are mandatory. In the Personal Details tab.
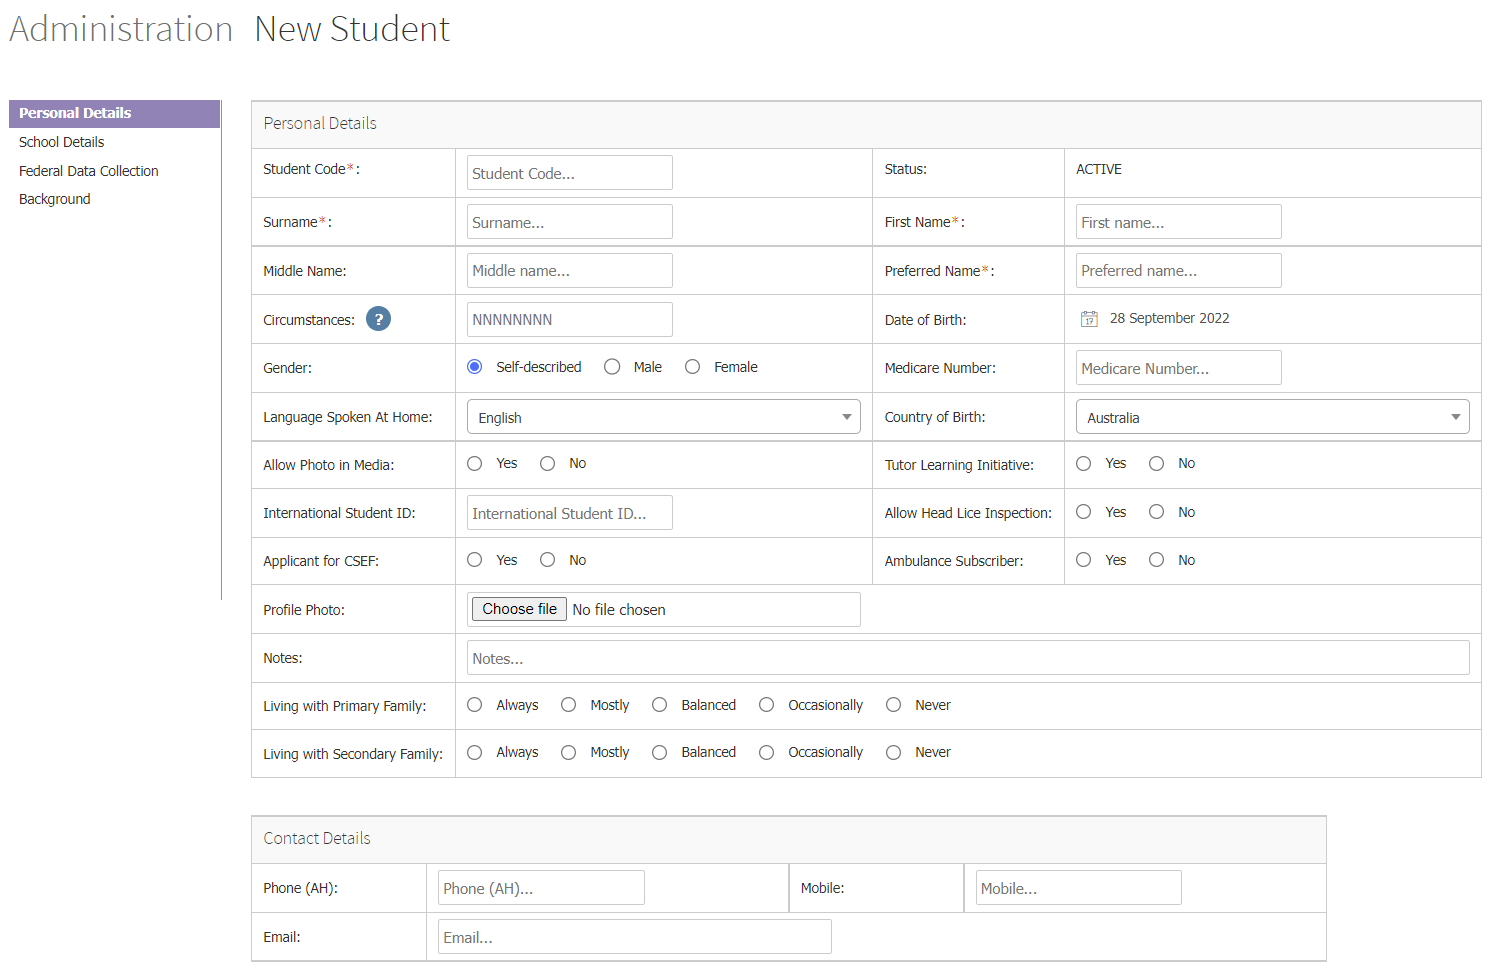
- In the Personal Details tab, you must also link the student to an existing Primary family using the Select Family Code dropdown list. You may also link the student to a Secondary family if they have one.

- Click the Save button at the bottom of the Personal Details tab.
Modifying data
- Go to Administration > Reports > Staff (for staff), Administration > Reports > Contacts (for parents/carers) or Administration > Reports > Students (for students and emergency contacts).
- Find the record to modify.
- Click on the pencil icon in the last column on the right in the person’s row.

- Make required changes and save the record as shown above in the relevant section for adding a new staff member, student or contact.
Deleting records
We do not recommend that you delete records, as historical data will be lost and cannot be recovered, unless the student record is exported as an archive file. Please contact Prestia Support for more information on this feature. Only delete records if added by mistake.
- Go to Administration > Reports > Staff (for staff), Administration > Reports > Contacts (for parents/carers) or Administration > Reports > Students (for students).
- Find the record to remove.
- Click the X icon in the second column from the right in the person’s row.

- Click OK.
Cara menambah dan mengubah informasi siswa, kontak, dan staf secara manual
Artikel ini hanya ditujukan untuk sekolah yang menggunakan Prestia sebagai Sistem Informasi Siswa (Student Information System / SIS) mereka, yang ingin menambahkan dan mengubah data siswa, kontak, dan staf secara manual.
Penting: Artikel ini diperuntukkan bagi sekolah tanpa SIS (seperti CASES21).
Sekolah yang menggunakan SIS tidak disarankan untuk mengubah data secara manual, kecuali jika mereka perlu mengubah nama atau kode secara manual sebelum sinkronisasi data terjadwal dengan sistem SIS mereka. Harap diingat bahwa SIS biasanya akan menimpa (overwrite) setiap pembaruan manual yang dibuat di Prestia pada sinkronisasi berikutnya.
Pendahuluan
Informasi siswa, orang tua/wali, kontak darurat, dan staf umumnya diimpor dari Sistem Informasi Sekolah (School Information System / SIS), seperti CASES21 melalui Eduhub, EdSAS melalui skrip, dan lain-lain.
Metode ini membuat data terbarui secara otomatis dari SIS, sekaligus memastikan data tersebut sama dengan data yang ada di SIS. Namun, beberapa sekolah tidak memiliki SIS.
Mengaktifkan Penginputan Data Manual
-
Buka Options > Software Settings > General Settings.
-
Di samping SIS Setting:, centang kotak Allow user management within Prestia.
-
Klik OK.
-
Tambahkan awalan (prefix) opsional untuk kode staf, siswa, dan/atau kontak pada kolom yang relevan.
-
Gulir ke bagian bawah halaman dan klik tombol Save.
Menambahkan Data Staf Baru
-
Buka Administration > Reports > Staff.
-
Klik tombol Add staff.
-
Masukkan rincian staf pada setiap tab Personal Details, School Details, Availability, dan Federal Schools Census sesuai kebutuhan. (Catatan: Kolom yang ditandai dengan tanda bintang merah wajib diisi).
-
Klik tombol Save di bagian bawah tab Personal Details.
Menambahkan Data Kontak (Orang Tua/Wali) Baru
-
Buka Administration > Reports > Contacts.
-
Klik tombol Add Family.
-
Masukkan data ke dalam kolom untuk keluarga baru sesuai kebutuhan. (Catatan: Kolom yang ditandai dengan tanda bintang merah wajib diisi).
-
Klik tombol Save.
Menambahkan Data Siswa Baru
Catatan: Jika siswa tidak memiliki saudara kandung lain di sekolah tersebut, kami menyarankan Anda untuk membuat kontak keluarga baru menggunakan langkah-langkah di atas sebelum menambahkan siswa baru, agar mereka dapat dihubungkan ke keluarga baru dengan mudah.
-
Buka Administration > Reports > Students.
-
Klik tombol Add student.
-
Masukkan data ke dalam kolom untuk siswa baru pada setiap tab Personal Details, School Details, Federal Data Collection, dan Background sesuai kebutuhan. (Catatan: Kolom yang ditandai dengan tanda bintang merah wajib diisi).
-
Di tab Personal Details, Anda juga harus menghubungkan siswa ke keluarga Utama (Primary family) yang sudah ada menggunakan daftar dropdown Select Family Code. Anda juga dapat menghubungkan siswa ke keluarga Sekunder (Secondary family) jika ada.
-
Klik tombol Save di bagian bawah tab Personal Details.
Mengubah Data
-
Buka Administration > Reports > Staff (untuk staf), Administration > Reports > Contacts (untuk orang tua/wali), atau Administration > Reports > Students (untuk siswa dan kontak darurat).
-
Cari data yang ingin diubah.
-
Klik ikon pensil di kolom paling kanan pada baris orang tersebut.
-
Lakukan perubahan yang diperlukan dan simpan data seperti yang dijelaskan pada bagian penambahan staf, siswa, atau kontak baru di atas.
Menghapus Data
Peringatan: Kami tidak menyarankan Anda menghapus data, karena data riwayat akan hilang dan tidak dapat dipulihkan, kecuali jika data siswa diekspor sebagai file arsip. Silakan hubungi Prestia Support untuk informasi lebih lanjut mengenai fitur ini. Hanya hapus data jika dimasukkan karena kesalahan.
-
Buka Administration > Reports > Staff (untuk staf), Administration > Reports > Contacts (untuk orang tua/wali), atau Administration > Reports > Students (untuk siswa).
-
Cari data yang ingin dihapus.
-
Klik ikon X di kolom kedua dari kanan pada baris orang tersebut.
-
Klik OK.