
How to import your timetable if you are using an external timetabling package
- Human Edge First Class
- The Timetabler
- EdVal
- MAZE
- CASES21 / CHESS
Opsi Impor
- Impor sebagai jadwal yang benar-benar baru
Opsi ini akan mengimpor jadwal yang benar-benar baru dengan kelas-kelas baru, dan membuat Markbook serta kelas pelaporan baru. Kami hanya menyarankan Anda memilih opsi ini saat Anda mengimpor jadwal yang benar-benar baru (misalnya, di awal tahun ajaran baru). JANGAN gunakan opsi ini jika Anda mengimpor jadwal Anda di tengah semester atau hanya memperbarui jadwal Anda, karena Anda akan berakhir dengan kelas ganda. - Impor jadwal yang diperbarui
Pilih opsi ini untuk mengimpor jadwal yang diperbarui, karena ini memperpanjang kelas terjadwal yang sudah ada sebelumnya. Pilih opsi ini jika Anda mengimpor jadwal Anda di tengah semester, atau tengah tahun ajaran, dan Anda ingin beberapa atau semua kelas Anda diperpanjang selama beberapa semester.
Cara Prestia menangani pengajaran tim (team teaching), kelas gabungan, tugas pengawasan halaman, dan kehadiran
Harap baca artikel terkait di bagian bawah halaman ini untuk mempelajari bagaimana Prestia menangani pengajaran tim (team teaching), kelas gabungan, tugas pengawasan halaman, dan data kehadiran saat jadwal diimpor.
Cara mengimpor jadwal Anda
Peringatan
Mengimpor jadwal dengan tanggal mundur akan menyebabkan kelas dan pendaftaran kelas apa pun yang tidak lagi terjadwal dalam impor Anda dihapus, bersama dengan data kehadiran dan penilaian terkait. Kelas dan pendaftaran kelas yang sudah ada yang diimpor ulang tidak akan memengaruhi data kehadiran dan penilaian Anda yang sudah ada dan tidak akan dihapus. Harap cadangkan database Anda sebelum Anda mengimpor jadwal Anda.
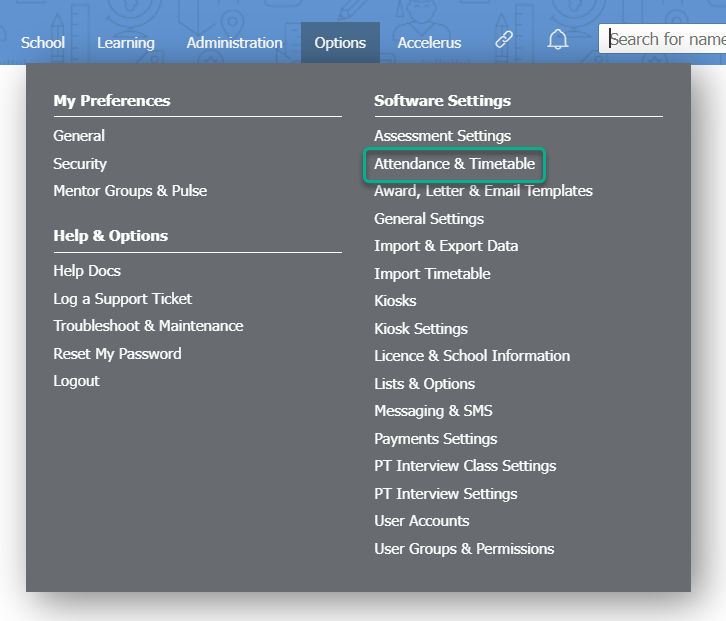
- Verifikasi bahwa Anda telah memilih paket jadwal yang benar. Buka Options > Software Settings > Attendance & Timetable .
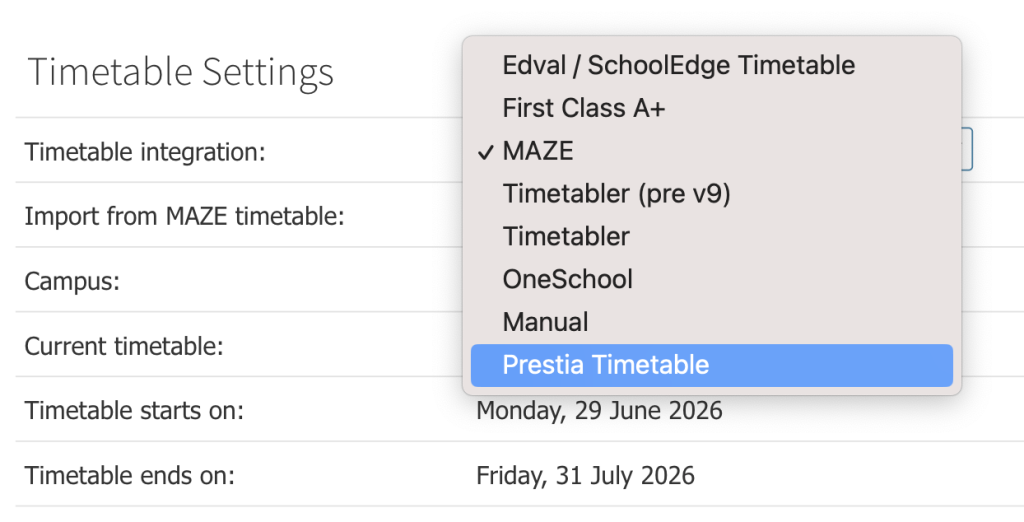
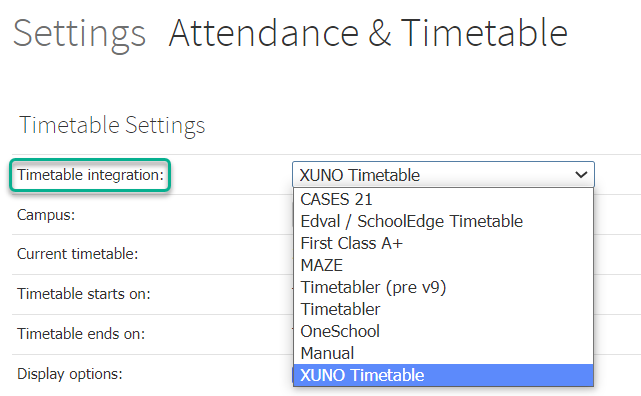
- Pastikan pilihan yang benar telah dibuat di daftar drop-down Timetable integration: . Jika tidak, pilih opsi jadwal yang benar lalu gulir ke bagian bawah halaman dan klik tombol Save .
4. Di Prestia, buka Options > Software Settings > Import Timetable . Catatan: Jika Anda menggunakan Prestia Basic Timetable, opsi ini tidak tersedia untuk Anda.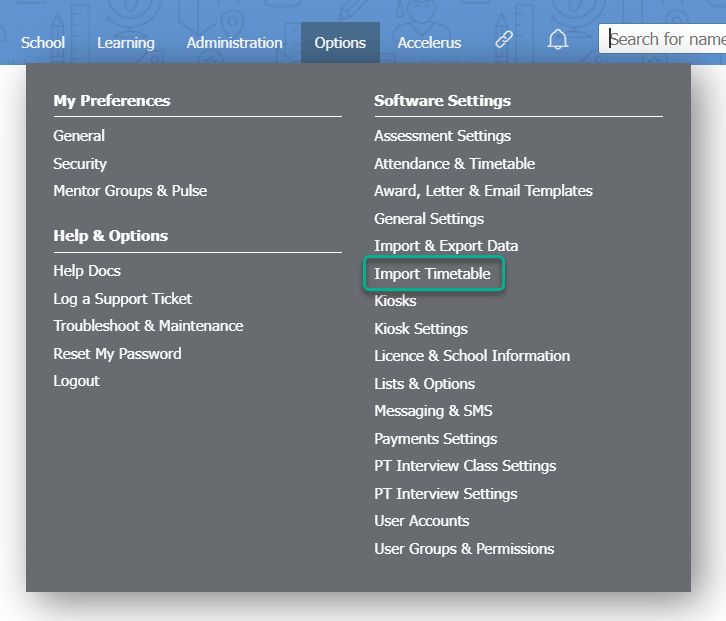
5. Pilih Import an updated timetable atau Import as a completely new timetable.
PERINGATAN: Harap baca deskripsi setiap opsi di bagian atas halaman ini sebelum melanjutkan. 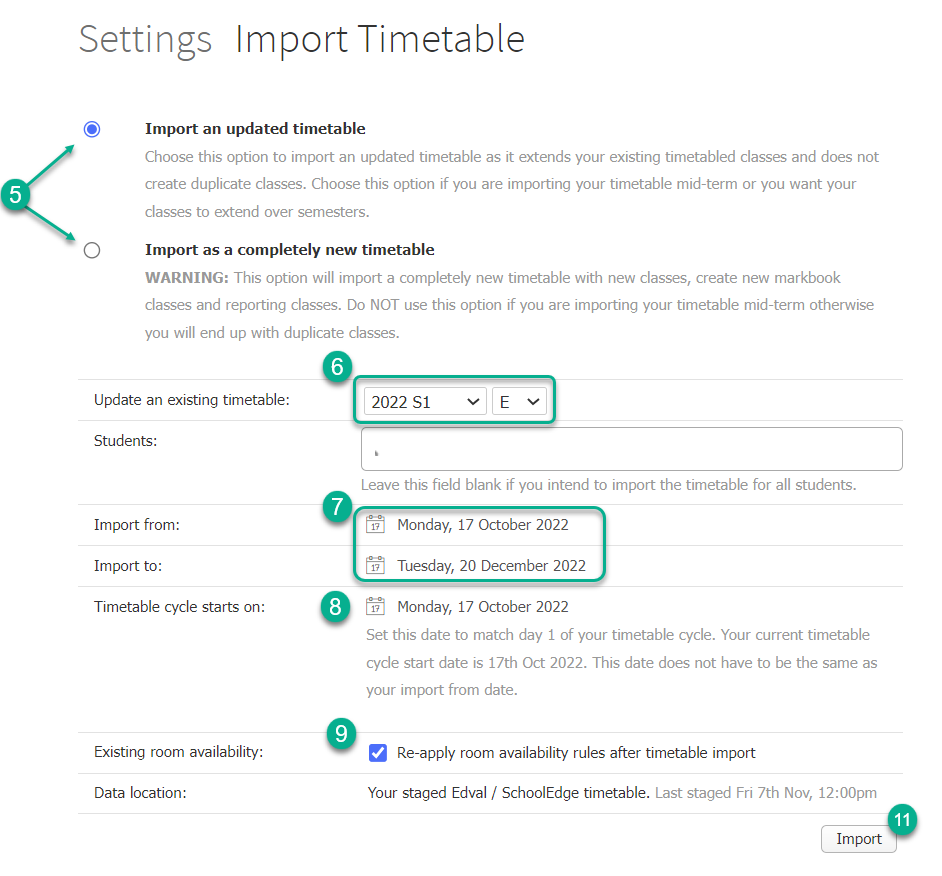
6. Pilih tahun dan semester dari daftar drop-down pertama, dan versi dari daftar drop-down kedua yang sesuai dengan ‘quilt‘ jadwal yang akan Anda perbarui atau impor.
7. Pilih tanggal mulai dan berakhir untuk impor jadwal ini dengan mengatur tanggal Import from dan Import to . Anda dapat mengedit tanggal ini dengan mengkliknya lalu memilih tanggal baru dari pemilih kalender yang muncul.
8. Pilih tanggal Timetable cycle starts on: Anda, yang akan menjadi Hari 1 dari siklus jadwal Anda.
9. Centang kotak Re-apply room availability rules after timetable import agar Prestia dapat mencoba menerapkan kembali semua pertukaran dan perubahan ruangan yang sesuai. Aturan yang tidak dapat diterapkan dan menyebabkan konflik akan muncul sebagai peringatan di Daily Organisation .
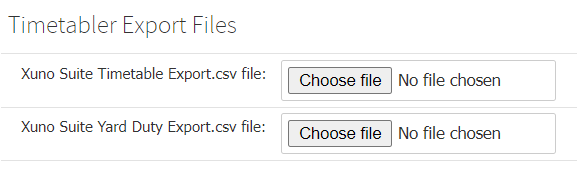
10. Unggah file jadwal yang diperlukan. Beberapa jadwal secara otomatis disiapkan untuk diimpor tanpa Anda harus mengunggah file-file ini secara manual. Klik tombol Choose file dan pilih file Anda sebagaimana ditentukan di Prestia.
11. Klik tombol Import untuk mengimpor jadwal Anda. Baca informasi pop-up dan klik OK untuk melanjutkan.
12. Setelah jadwal Anda diimpor, Anda harus mengatur periode penjadwalan Anda. Ini hanya dilakukan pertama kali Anda mengimpor jadwal ke Prestia.
We support and import timetables from the following software packages. Please read the related timetabling articles to learn how to export your timetable from your timetabling software.
- Human Edge First Class
- The Timetabler
- EdVal
- MAZE
- CASES21 / CHESS
Import Options
Import as a completely new timetable
This option will import a completely new timetable with new classes, and create new Markbook and reporting classes. We only recommend that you choose this option when you are importing a completely new timetable (e.g. at the beginning of a new year). DO NOT use this option if you are importing your timetable mid-term or just updating your timetable, because you will end up with duplicate classes.
Import an updated timetable
Choose this option to import an updated timetable, as it extends any previously existing timetabled classes. Choose this option if you are importing your timetable mid-term, or mid-semester, and you want some or all of your classes to extend over semesters.
How Prestia handles team teaching, composite classes, yard duties and attendance
Please read the related article at the bottom of this page to learn how Prestia handles team teaching, composite classes, yard duties, and attendance data when a timetable is imported.
How to import your timetable
Warning
Backdating a timetable import will cause any classes and class enrolments that are no longer timetabled in your import to be deleted, along with the associated attendance and assessment data. Existing classes and class enrolments that are re-imported will not affect your existing attendance and assessment data and will not be deleted. Please back up your database before you import your timetable.
- Verify that you have selected the correct timetable package. Go to Options > Software Settings > Attendance & Timetable .
- Ensure that the correct selection has been made in the Timetable integration: dropdown list. If not, select the correct timetable option and then scroll to the bottom of the page and click the Save button.
- Export your timetable from your timetabling software package. Read the applicable related article to learn how to export your timetable.
- In Prestia, go to Options > Software Settings > Import Timetable . Note: If you are using a Prestia Basic Timetable, this option is not available to you.
- Choose to either Import an updated timetable or Import as a completely new timetable . WARNING: Please read the descriptions of each option at the top of this page before proceeding.
- Select the year and semester from the first dropdown list, and the version from the second dropdown list that corresponds to the timetable ‘quilt’ that you will be updating or importing.
- Choose the start and end dates for your this timetable import by setting the Import from and Import to dates. You can edit these dates by clicking on them and then selecting a new date from the calendar picker that appears.
- Select your Timetable cycle starts on: date, which will be Day 1 of your timetable cycle.
- Tick the Re-apply room availability rules after timetable import checkbox so that Prestia can attempt to reapply all corresponding room swaps and changes. Rules that cannot be applied and cause conflicts will show up as an alert in the Daily Organisation .
- Upload any required timetable files. Some timetables are automatically staged ready for import without you having to manually upload these files. Click the Choose file button and select your file(s) as specified in Prestia.
- Click on the Import button to import your timetable. Read the popup information and click OK to proceed.
- Once your timetable has been imported, you must set up your timetabling periods. This is only done the first time you import a timetable into Prestia.